Using LetsEncrypt With Serverpilot
If you need to quickly set up a blank server or don’t have much experience with systems administration then you can’t really go wrong with serverpilot. The free plan covers everything you really need to set the server up and keep it updated but it has one large drawback in that you need to upgrade to a paid plan to install and manage free SSL certificates.
Obviously, the company needs to make some money to keep running and a paid plan also gets you other features like monitoring, but if you just want to install a certificate and don’t need the other extras then you can use the following method.
The basic steps we are going to take are:
- Install the official LetsEncrypt client Certbot.
- Use Certbot to generate a certificate for a domain name.
- Configure NGINX to use the generated certificate.
- Set up a cron job to automatically renew the certificates.
1. Installing Certbot on Serverpilot
Serverpilot comes with Git pre-installed so we can just clone the Certbot repository into a folder with the following command:
sudo git clone https://github.com/certbot/certbot /opt/certbotThe first time we run a command asking it to do anything it will download all the packages it needs in order to install the certificates. Certbot creates its own environment to make it as compatible with as many systems as possible (As I understand it), so the first command may take a little time.
Move into the certbot directory with:
cd /opt/certbotThat’s it. Time to install a certificate.
2. Generating a Certificate for an Existing Domain
As Serverpilot has a unique folder structure compared to a standard Ubuntu install, we can’t use any of the auto commands, we need to use the —webroot flag to tell Certbot where the web accessible folder is for the domain that we want to generate the certificate for.
Certbot needs to know where the web root for the domain is as it is used to verify that the domain name points to your server. It creates a folder in the root named .well-known and creates a verification file with information sent from the LetsEncrypt API. For this reason, the domain name needs to be pointing to the server before you try to obtain a certificate and the .well-known folder should not be blocked by any .htaccess rules.
With the free Serverpilot tier, all domains are installed under:
/srv/users/serverpilot/apps/APP_NAME/publicso you need to replace APP_NAME in the following command to match the name of the app we are installing the certificate for.
We also need to specify each domain that we want a certificate for, so if you want the domain to be accessible on both www and without www then you need to specify both the main domain and the subdomain to get 2 certificates. Change the command to the name of your domain and then run it:
./certbot-auto certonly --webroot -w /srv/users/serverpilot/apps/APP_NAME/public -d domainname.com -d www.domainname.comAfter Certbot downloads everything it needs you will be asked for an email address which is used for notifications about expiring certificates. Enter your address and then you should see a message that the certificates have been installed.
3. Configure NGINX to Use the Certificate
To be able to use the certificates, we need to create a configuration file for NGINX so that it knows where to find the certificates for the domain and how they should be used.
Move to the folder where the config files are stored:
cd /etc/nginx-sp/vhosts.dthen take a look at the folder contents with
sudo lsfor each domain installed on the server you should see one configuration file and one folder for additional configurations both using the name of the app:
appname.conf
appname.d
We need to create a new configuration file of the same name with .ssl appended to the end of the app name. So if the app name is ‘appname’ as the above example, we would need to create appname.ssl.conf with:
sudo nano appname.ssl.confThe following configuration file tells NGINX where to find the certificates for the domain and enables http/2 with some strong encryption methods:
First, search and replace APP_NAME with the name of your app and domainname.com with your domain. Make sure you add all the subdomains that you generated certificates for after server_name.
You can paste into the console with a right mouse click after copying the contents to the clipboard.
server {
    listen 443 ssl http2;
    listen [::]:443 ssl http2;
    server_name  domainname.com www.domainname.com;

    # letsencrypt certificates
    ssl_certificate      /etc/letsencrypt/live/domainname.com/fullchain.pem;
    ssl_certificate_key  /etc/letsencrypt/live/domainname.com/privkey.pem;

        #SSL Optimization
        ssl_session_timeout 1d;
        ssl_session_cache shared:SSL:20m;
        ssl_session_tickets off;

        # modern configuration
        ssl_protocols TLSv1 TLSv1.1 TLSv1.2;
        ssl_prefer_server_ciphers on;

        ssl_ciphers 'ECDHE-RSA-AES128-GCM-SHA256:ECDHE-ECDSA-AES128-GCM-SHA256:ECDHE-RSA-AES256-GCM-SHA384:ECDHE-ECDSA-AES256-GCM-SHA384:DHE-RSA-AES128-GCM-SHA256:DHE-DSS-AES128-GCM-SHA256:kEDH+AESGCM:ECDHE-RSA-AES128-SHA256:ECDHE-ECDSA-AES128-SHA256:ECDHE-RSA-AES128-SHA:ECDHE-ECDSA-AES128-SHA:ECDHE-RSA-AES256-SHA384:ECDHE-ECDSA-AES256-SHA384:ECDHE-RSA-AES256-SHA:ECDHE-ECDSA-AES256-SHA:DHE-RSA-AES128-SHA256:DHE-RSA-AES128-SHA:DHE-DSS-AES128-SHA256:DHE-RSA-AES256-SHA256:DHE-DSS-AES256-SHA:DHE-RSA-AES256-SHA:!aNULL:!eNULL:!EXPORT:!DES:!RC4:!3DES:!MD5:!PSK';

        # OCSP stapling
        ssl_stapling on;
        ssl_stapling_verify on;

        # verify chain of trust of OCSP response
        ssl_trusted_certificate /etc/letsencrypt/live/domainname.com/chain.pem;
        #root directory and logfiles
        root /srv/users/serverpilot/apps/APP_NAME/public;

        access_log /srv/users/serverpilot/log/APP_NAME/nginx.access.log main;
        error_log /srv/users/serverpilot/log/APP_NAME/nginx.error.log;

        #proxyset
        proxy_set_header Host $host;
        proxy_set_header X-Real-IP $remote_addr;
        proxy_set_header X-Forwarded-For $proxy_add_x_forwarded_for;
        proxy_set_header X-Forwarded-SSL on;
        proxy_set_header X-Forwarded-Proto $scheme;

        #includes
        include /etc/nginx-sp/vhosts.d/APP_NAME.d/*.nonssl_conf;
        include /etc/nginx-sp/vhosts.d/APP_NAME.d/*.conf;
}
After pasting the content into the console, close the editor with ctrl + x and confirm that you want to save the file.
Restart NGINX with the following to load the new configuration files:
sudo service nginx-sp restartIf all went well, you should now be able to access your domain using https.
4. Automatically Renewing Certificates
LetsEncrypt certificates only last for 3 months at a time so it wouldn’t be fun to have to remember to update them manually. Luckily Certbot comes with a command which will check for certificates that are coming up to their expiry date and will automatically renew them. It checks for certificates that need to be renewed in less than 30 days, so if we run the command once a week it gives us 4 attempts should anything fail at the time. If anything is wrong, you will also get an email from LetsEncrypt about the upcoming expiration.
We can create a cron job to run as root once a week on a Sunday to check for expiration with the following:
sudo nano /etc/cron.d/certrenewalCopy the following into the editor:
MAILTO=me@mydomain
#runs every Sunday at 8am
0 8 * * 0 root cd /opt/certbot; ./certbot-auto renew --post-hook "service nginx-sp restart"
If you want to receive email notifications when the job runs, change the email address to your own. If not, you can remove that line.
The —post-hook flag is very important as it restarts NGINX after a new cert has been installed, without it we would have new certificates but they wouldn’t be loaded so it may look like the certificates are all valid but the site will not be accessible through a secure connection.
Restart the cron service to load the new file:
sudo service cron restartDone
You should now have a working certificate that will auto-renew.
You can test that http/2 is working here.
And you can see all your sites assets loading at the same time at webpagetest.org.
If you need to install any more certificates, just follow steps 2 and 3 again and don’t forget to restart NGINX after installing.
Removing Certificates
If you want to remove a certificate in the future, log back into your server and move into the certbot folder
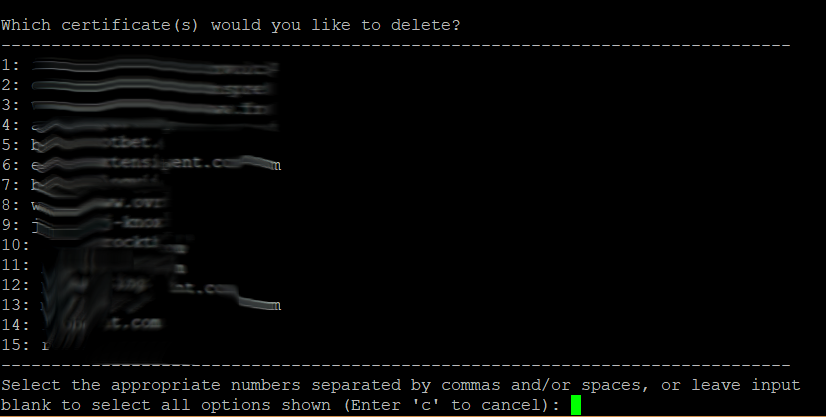
cd /opt/certbotThen use the command:
sudo ./certbot-auto deleteYou will then see a list of domains that certificates are installed for. You can enter a comma-separated list of the numbers that you want to remove.
After deleting the certificates, move back to the virtual hosts folder and delete the ssl conf files related to the domains that you just removed.
cd /etc/nginx-sp/vhosts.d
sudo rm -rf appname.ssl.conf
And finally, restart nginx to apply the changes:
sudo service nginx-sp restart